✨ Elevate Your Windows with Style and Privacy!
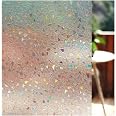
The LEMON CLOUD Decorative Window Film is a versatile and eco-friendly solution for enhancing your home’s privacy and aesthetics. Measuring 17.5 x 78.7 inches, this frosted glass static cling film features a stunning 3D rubble design that casts iridescent colors when sunlight hits it. With no adhesives required, installation is a breeze, and it effectively blocks 99% of UV rays while allowing soft light to filter through.


| Item Dimensions L x W | 17.5"L x 78.7"W |
| Size | 17.5 x 78.7 Inch |
| Color | Clear-rubble Pattern |
| Ultraviolet Light Protection | 99 |
| Material Type | Vinyl |
| Installation Method | Static Cling |
S**9
Let the sun shine in and block the neighbor's ugly yard
I bought this because my kitchen window, where I stand to do dishes, faces my neighbor's awful yard. I wanted the sunshine, but not the view. This was my solution. It is easy to install. The only tricky part is trimming it.
A**N
Easy Install, elegant look
Took only 15-20 minutes to do one window. Very easy however edges didn’t seem to stick but as water dried it started to stick after time.
R**H
Works great! But not total blackout
Im I'm giving this 4 stars because it is not total blackout... but its pretty close! These photos were taken. At noon on a clear day.work 3rd shift and have been thinking of blacking out my bedroom window. I loved the pattern of this so gave it a go. Easy to install. It blacks out as much as if it were night and there's a bit of light out. There are pinhole sized spots that let light through (they are not actual holes) but none are large enough to let light shine. But I suspected as thin as this was it wouldn't be total blackout.However, I did seal the edges with electrical tape to close any gaps from trimming it down.I highly recommend installing this in pure daylight to make sure its aligned for the best coverage.
T**A
Perfect blackout!
Complete bedroom window blackout. The portion that looks prismatic is painted on. These are not see through at all. They are perfect for what I wanted. My dogs think everyone should get up when the comes up…that’s a really early time during the summer. Used the tinted versions on all the other windows to block the intensity of the sun. Love these for how well they stay in place.
J**B
Fantastic cure for ugly shower doors!
This product was perfect for improving the appearance of my tacky, plain shower - see the attached before and after pics (turned sideways after upload!). I did not like that shampoo bottles, etc were visible in my shower, and I don't like the tile color on the walls but could not afford to retile the shower walls. This film applied to the glass was the perfect solution! I discovered there are a few keys to successful application: allow yourself plenty of time to make sure you do it right the first time. From start to finish it took me about 4 hours to finish the 3 panels of my shower but I cleaned the glass (outside, not inside) of the shower enclosure several times with Windex, especially at the top of the glass panels since that area holds most of the weight of the film. I measured the panels and the sections of file VERY carefully several times before cutting to make sure I was measuring correctly. To make sure I could cut in a straight line, I marked the scissors cut lines with pieces of black electrical tape (easy to see) applied every few inches to the film backing since that was being removed. Then, I used a spray bottle to get the glass dripping wet before I peeled off the backing from only the top 12" or so, and once that was positioned correctly, I sprayed the lower area of glass more, pulled the backing down another 12" or so and positioned that area, checking the very top again to see if I had moved it, then repeated those steps until I got to the bottom. Then I used my hand and a plastic spatula wrapped in paper towel to remove air bubbles by carefully sliding it several times from the center of the film toward the outer edges. When all air bubbles were out, I very slowly and carefully trimmed the excess with a single edge razor blade. It is time-consuming but I think my great results were because I worked slowly - once that backing is removed from the glass film, I did not want to mess things up and have to try to clean the back of the film or clean the window while keeping the film lint free. NOTE TO MANUFACTURER: you could make us buyers much happier if you would help us understand which side is the backing. I read many reviews from people who were not happy with your product because it was not staying on the glass - you responded by suggesting they probably did not remove the backing. I had no trouble getting the film to stick, so you are probably correct about people not removing the backing but how about making it easier for your customers by putting a sticker on the backing or some kind of printing to tell us which side should peel off?
T**Y
Great for blocking views but not natural light
This is our first front door that has glass. While I tried to get used to having a see through front door, I just couldn't shake that feeling I was being watched. We have some etched glass and some clear parts. I looked into buying some tint film thinking it had a one way mirror effect all the time, not just during the day. However that's not a thing that I'm aware of. I found this film and I liked the look. Since it matched our original door glass style I decided to give it a try. I don't have before and after pictures sadly, just after.Installation was rather simple, however I recommend having an extra set of hands to help. I would also use a box cutter instead of a scissor to cut your desired sizing. I had to go back with a box cutter to fix my jagged scissor cuts. Once I had it cut I did a few dry runs (Leaving film on ) and verifying that I didn't have any edges sticking up that would prevent it from adhering properly. Once I liked the dry fit I removed the backing and got to work. Make sure to apply plenty of water... and I mean lots of misted water. I used distilled water in a fine mist sprayer. I used distilled because we have very hard water here and I wasn't sure if spots would remain after it dried. Looking back it probably wouldn't be an issue. I used our shower squeegee to smooth out the air bubbles. It took all of five minutes to get it installed once cut. Not bad at all.Once I sprayed the glass the window film just sticks on. Having a second set of hands would have helped placing the bottom portion and the top portion exact. It took some working but I was able to move the film to where it needed to go. After my first attempt I realized I didn't spray enough water because it didn't move as freely as I would have liked. Once i sprayed liberally it was much easier to shift and drag the film to where it needed to go.All in all it looks really well and my wife was surprised to see it done so easily. It looks so good IMO that it could be confused for the real thing. It makes the view blurry enough to make out colors and shapes but not clear enough to see anything like see through glass. Granted if you put your face right up to it you can see through the clear specs, but if someone wants to look that closely who am I to deny them.
Trustpilot
2 months ago
2 months ago